
This post contains affiliate links. Please see our disclosure policy.
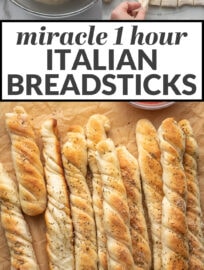
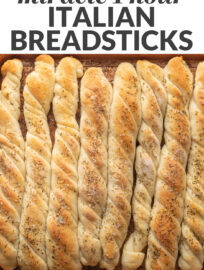
Learn how to make the most incredible soft breadsticks at home in just one hour. Once you see how delicious and easy these are, you’ll crave your own homemade breadsticks all the time!
Baking bread can be so therapeutic and the results are always delicious! Try this perfect no-knead Dutch oven bread next. No yeast? No problem – change things up and give these best ever flour tortillas a try!

Making homemade breadsticks might seem like a major project, something that would take the better part of a day or require lots of practice.
But, thanks to this easy recipe, anyone can whip up a batch of delicious, soft, perfectly-seasoned breadsticks in just one hour. Even a bread-baking beginner. Pinky swear!
My family always gets excited when I get ready to make these, and I guarantee they will be a hit in your home, as well.
Ingredients
Here’s what you’ll need. As always, follow the full recipe below for detailed amounts and instructions.
- Flour – I usually use bread flour if I have it, but all-purpose works perfectly well, also. You can also use a mix, or swap up to half of the bread with whole wheat flour – the recipe is very adaptable.
- Instant rise yeast – one small packet, or 2 1/4 teaspoons if you’re measuring from a jar.
- Sugar – just a small spoonful adds that irresistible touch of sweetness.
- Butter – obviously!
- Seasonings – we love to sprinkle the breadsticks with Italian seasoning, garlic powder, and sea salt. The flavor is perfect!
Want to make cheesy breadsticks? Easy – just sprinkle on some greated Parmesan, or even shredded mozzarella, before baking. And invite me over!
How to make homemade breadsticks
First, make the dough – you can mix this together in either a stand mixer or by hand. I’ve done both and the results are indistinguishable, so don’t worry if you don’t have or prefer not to bother with a mixer.
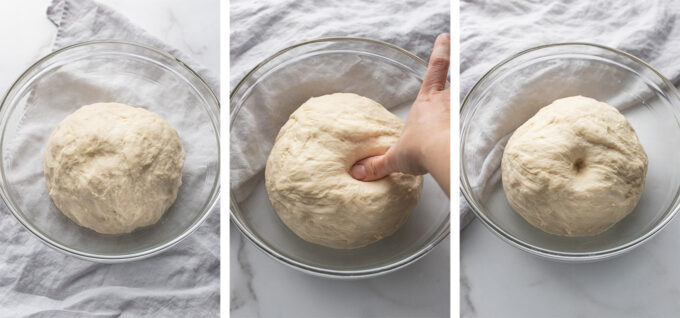
Mix well and knead lightly until the dough forms a smooth ball. It should be smooth and just a little bit sticky, but not enough to leave any real residue when you poke it with your finger. It will leave a little indentation like you see below. Let the dough rest in the bowl for about 10 minutes.
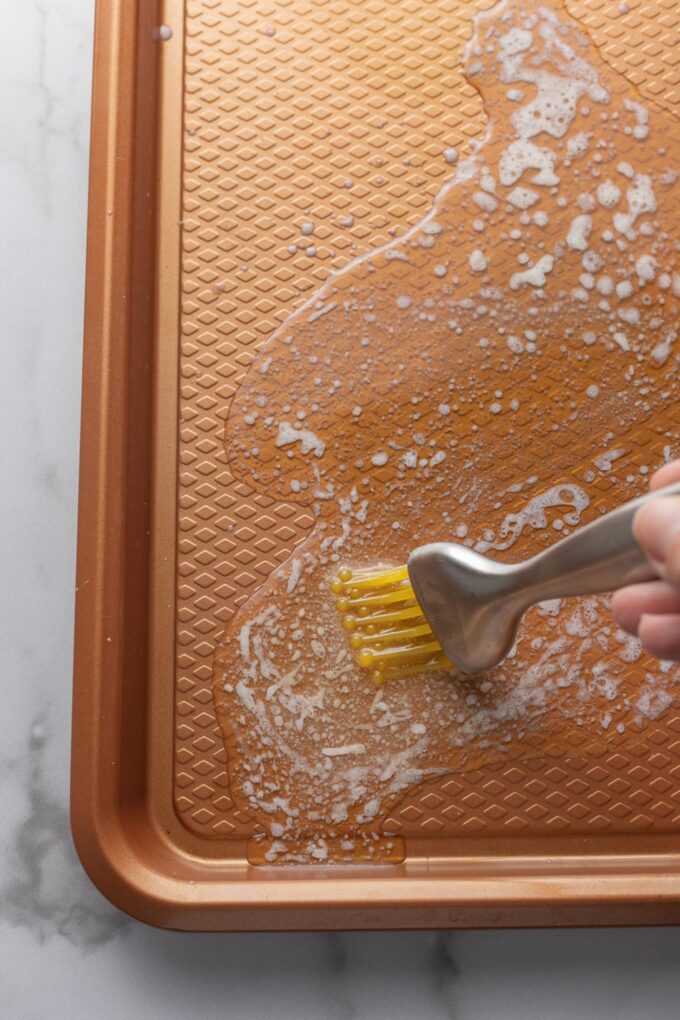
Meanwhile, preheat the oven and spread out a couple tablespoons of melted butter along your rimmed baking sheet. This greases the pan and gives the breadsticks terrific buttery flavor in one fell swoop!
I have tried melting the butter straight on the pan while the oven preheats, but since it’s such a small amount, you really have to watch it carefully to prevent burning. I’ve given up and now find it easiest to just melt the butter separately in the microwave, then pour it onto the baking sheet and spread it out with a pastry brush – or your fingers!
Now just transfer the dough to a lightly floured work surface and roll or press it out into a large rectangle. Cut it into strips using a pizza cutter.
Gently peel off each strip and twist it lightly. I find this easiest if I fold the strip in half, then twist, as in photo 4 below – otherwise the twists tend to get too long and flimsy in the middle.
Transfer all the finished twists onto the buttered baking sheet, space them out evenly, and sprinkle with the seasoning. Set aside for about 20 minutes – they’ll start to puff up. The magic of instant yeast!
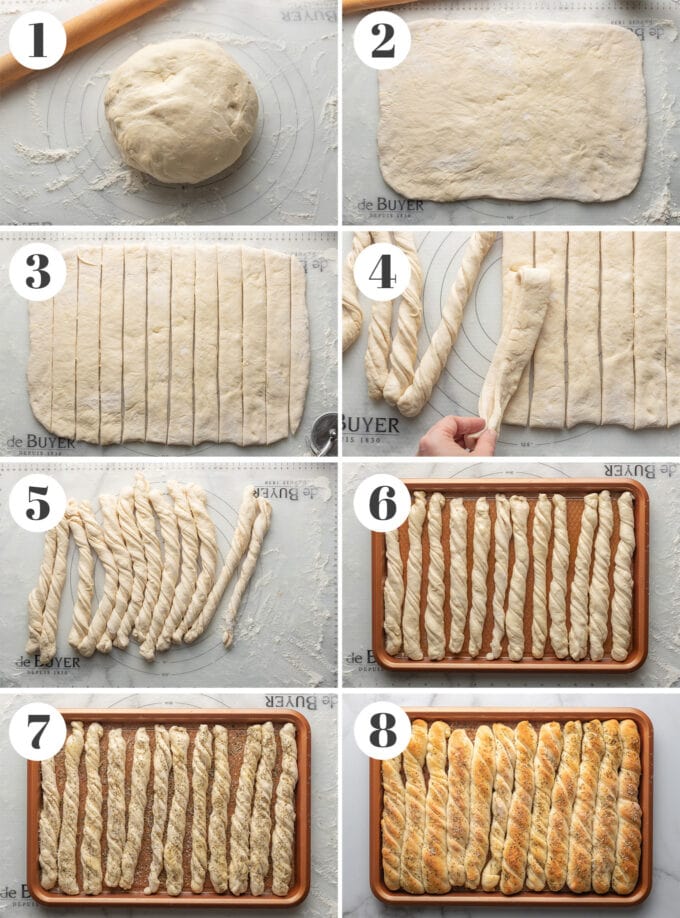
Lastly, just bake for about 15 minutes, until they’re golden on top. Boom! Homemade breadsticks!
Soft, chewy, golden brown, twirly Italian breadsticks straight from your oven? No one will believe they didn’t take you all day.
Pat yourself on the back, because YOU just majorly upped your cooking from scratch game.

Serve these with a tortellini or creamy chicken gnocchi soup, or spinach ricotta stuffed shells, plus a light salad for a dinner full of irresistible Italian flavor!
You can also FOLLOW me on PINTEREST, INSTAGRAM, and FACEBOOK for more great recipes and ideas!
The Best Homemade Breadsticks (in 1 Hour!)

Ingredients
- 1 1/2 cups warm water
- 2 1/4 tsp. (one packet) instant yeast
- 2 tbsp. granulated sugar
- 1 tsp. salt
- 3-4 cups bread or all-purpose flour , see note
- 3 tbsp. butter, melted
- Italian seasoning, garlic powder, and sea salt, for topping
Instructions
- In the bowl of a stand mixer fitted with a dough hook, combine the water, yeast, sugar, salt, and 1 cup of flour. Mix on medium speed to blend. (If you don’t have a stand mixer, this is also easy to mix by hand in a large bowl.)
- Continue adding flour just until the dough clears the sides of the bowl. You should add at least 3 cups flour total, but not more than 4. The dough should be soft and slightly sticky, but not leave much residue on your fingers. Continue kneading for 2-3 minutes, until dough comes together into a ball. Let it rest in the bowl for 10 minutes.
- Preheat the oven to 400 degrees F. Pour melted butter onto a large, rimmed baking sheet, and use a pastry brush (or your fingers) to spread it out across the entire surface area. Set the baking sheet aside.
- Turn out the dough onto a lightly floured work surface. Using your hands or a rolling pin, work the dough into a long rectangle, approximately 16” by 7”. Using a pizza cutter, cut the dough into strips about 1” wide.
- Lift each strip, fold in half, twist it slightly, and place about 1/2” apart on the buttered baking sheet. Sprinkle the breadsticks lightly with Italian seasoning, garlic powder, and sea salt.
- Let the breadsticks rise at room temperature for about 20 minutes, then bake for 15-17 minutes, until the tops are golden. Remove and serve right away.
Notes
- I usually use bread flour if I have it, but all-purpose works perfectly well, also. You can also use a mix, or swap up to half of the bread with whole wheat flour – it’s very adaptable.
- Leftovers keep well at room temperature for 2-3 days; I usually store in a ziplock bag that’s mostly closed, with about 1″ left open to avoid condensation building up on the inside.
- Adapted from Mel’s Kitchen Cafe.
Nutrition
Nutrition information is automatically calculated, so should only be used as an approximation.


My brother recommended these and was totally right! AMAZING!!
LOVE it! My new go-to! 🙂 such an easy thing! Never wanna buy frozen again!
I know just that feeling! Yay! Thank you so much for taking the time to leave this review.
Good morning,
I’m wanting to make these bread sticks for a crowd from 50-80. What would be your suggestion about making them a week ahead and freezing. Should I bale first then freeze? So I can just warm before serving or bake the day of party? How long can I freeze them?? Thanks for answering
Hi Diana- what a lucky crowd to have you baking these! I can’t say I’ve done this myself, but my best guess is that you would want to fully bake them, then freeze — I’m certain they would be fine for a week, probably more like 6-8 weeks if well-wrapped — defrost overnight and warm before serving. I would brush some extra butter on right before or after warming and maybe add another little sprinkle of sea salt then, too, just to get that “glow and sparkle” again. Please let me know how it goes, I would love to know your results and any other tips/tricks you discover!
Made them with sourdough turned out great!
These are my go-to when I need breadsticks for a meal. I’ve quit twisting them and just roll them into a log and they turn out like Oliver garden. I’ve also experimented and done half with some brown sugar cinnamon (twists) and an easy icing. Today I just sprinkled cinnamon sugar on a few. My point is the dough is very flexible and always turn out. Thank you!
OK, the idea with brown sugar cinnamon is absolutely GENIUS. I am going to try that the next time I want to make a treat for my kids. 🙂 Thank you for sharing this review and the fantastic idea!