No-Knead 4 Seed Dutch Oven Bread
This post may contain affiliate links. Please read our disclosure policy.
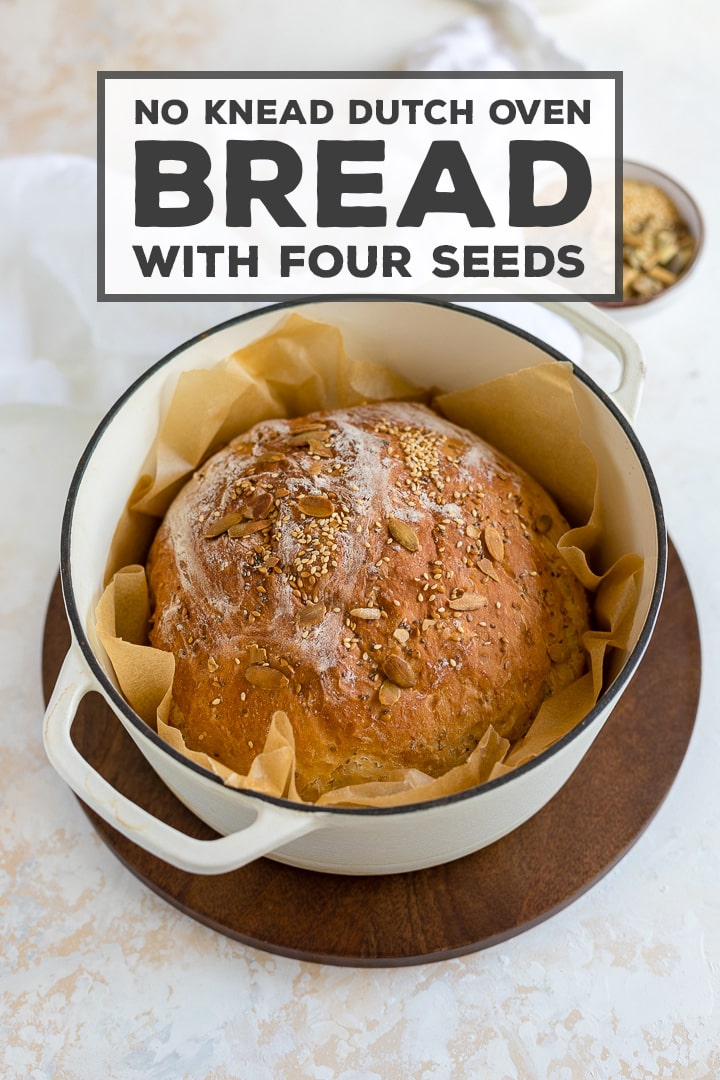
This is the best homemade Dutch oven bread! Seriously easy to make, even if you’re not used to baking with yeast. NO kneading required, and can be made to eat the same day – no need for an overnight rise. Your whole family will inhale this bread!
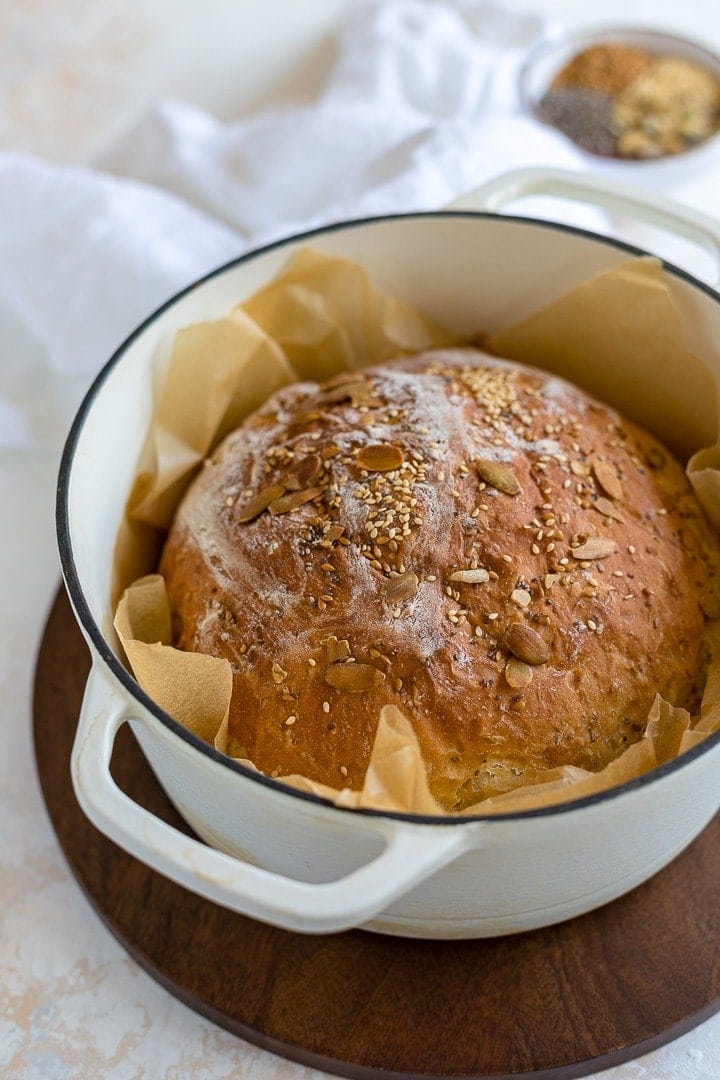
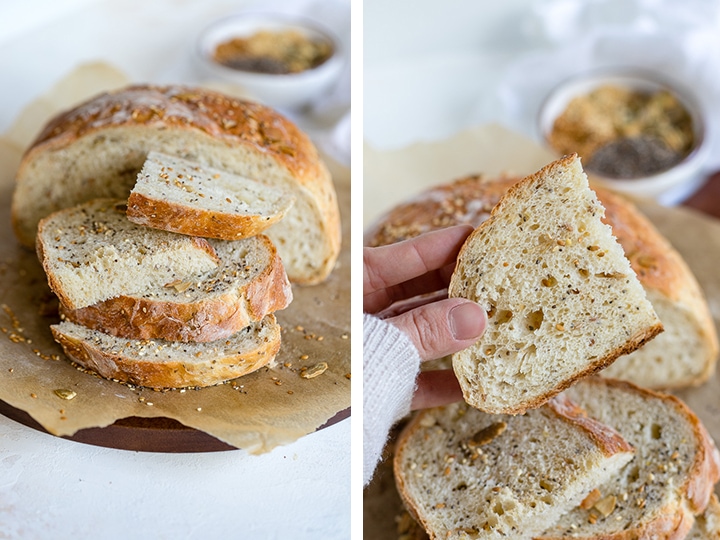
A hearty loaf of bread, crusty on the outside, soft and light on the inside.. is there anything more comforting?
I love baking bread, and was beginning to collect a lot more of my own recipes for it in the year or so before we moved to Belgium.
But, while we were there, I put most of those efforts on hold. The local bread was simply so good and so readily available. Imagine local boulangeries all over the place, with overflowing cases of freshly baked loaves, baguettes, rolls, pastries, and more. Some also sold farm-fresh eggs and cheese. Basically heaven.
And even the humble bread from the corner store equivalent of 7-11 was… amazing. Freshly-baked, devoid of preservatives, and perfect for everyday sandwiches, toast, and snacking. Needless to say, making my own bread for our three Belgium years felt like a fool’s errand.
Sadly, though, our easy boulangerie access came to an end with our return to the US. And so, I’ve had a renewed interest in baking some of our bread, when time permits.
How to make easy Dutch oven bread
If a hearty soup makes your heart skip a beat, or you believe any simple spaghetti or meatballs is improved with a crusty loaf to pass around the table, this bread is for you.
- No kneading. I repeat: no kneading!
- Easy to shape – the Dutch oven does it for you.
- Crackly, crisp crust – again compliments of baking at high heat in the Dutch oven.
- Perfectly soft interior.
- Make and eat in one day. No overnight rise!
The make and eat in the same day is what sets this apart from most other Dutch oven bread recipes you will find.
I rarely have the foresight – or energy – to start a loaf of bread the night before we’ll want to eat it. So I was delighted to experiment with rising and baking times and firm up a reliable same-day method. This is adapted from the core recipe in the book Artisan Bread in Five Minutes a Day (affiliate link), a classic for anyone interested in learning more about baking bread at home.
This Dutch oven bread does take several hours to make – almost all of it hands off. If I start the dough around lunchtime, the loaf will be cooled and ready for dinner.
- Stir together the dough and let it rise for a couple of hours.
- Dust with a little flour and fold it with a spatula.
- Fold again and shape into a ball.
- Transfer to parchment paper, sprinkle with seeds, and leave it to puff up for another 30-45 minutes.
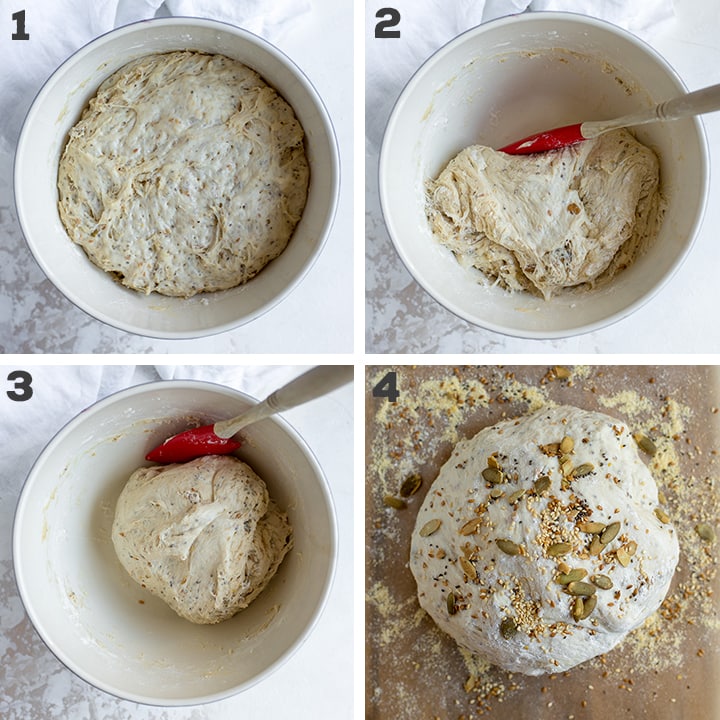
After that, you’ll bake for 30 minutes, and pull out the most amazing bread.
What seeds to use for homemade bread
You could certainly use this same recipe for a bread without seeds, if they’re not your thing. But, if you’re even seed-curious, I’d encourage you to give them a try. They add such a great complementary texture and flavor to the soft bread.
- Pumpkin seeds
- Sesame seeds
- Flax seeds
- Chia seeds
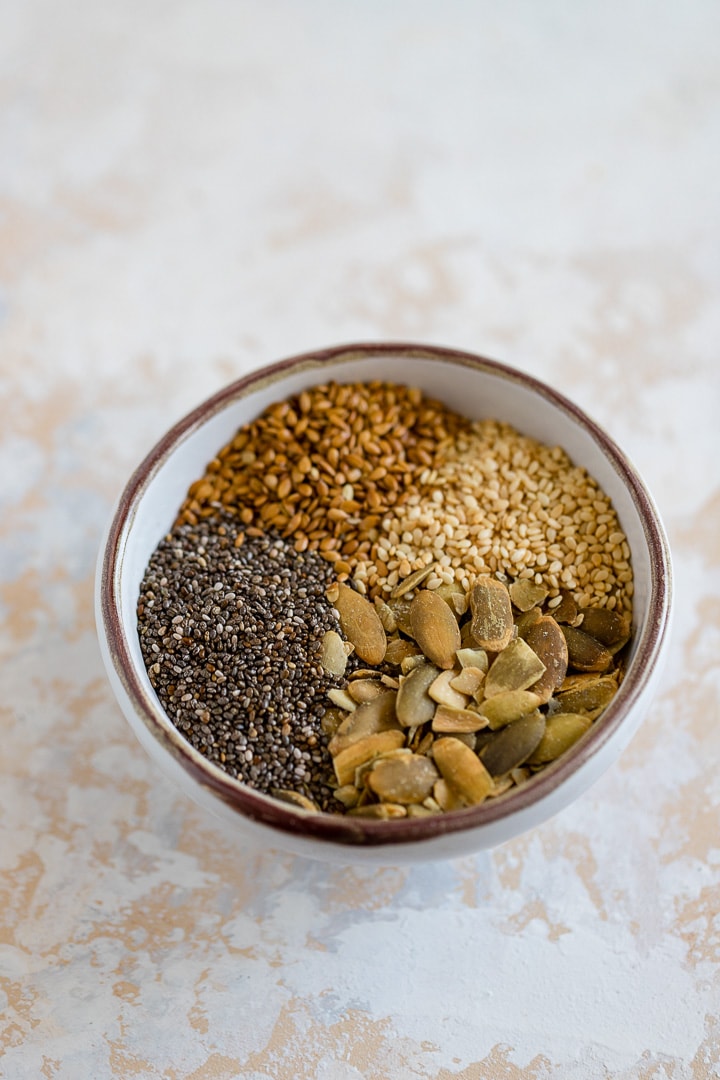
You could also use poppy seeds or anything else, really!
Homemade bread – you can do it!
If you’re skeptical of baking with yeast, this is a great recipe to get you started. The lack of kneading means you don’t need to worry too much about achieving just the right texture, and the dough is very forgiving.
The one thing you really will need for this recipe is a quality Dutch oven – I am a HUGE Dutch oven fan and have acquired several over the years. This 4 quart oven from Marquette Castings is the one pictured here (affiliate link). I absolutely love it! It’s a workhorse and as high-quality as some others I have that cost 4x as much.
Plus, it’s just pretty to look it. I leave it on the stove 95% of the time. 🙂
More homemade bread recipes:
- Flour tortillas from scratch (pinned 500,000+ times!!)
- One-hour breadsticks
- Whole wheat pita bread
- Rosemary cheddar Irish soda bread (a must-make for St. Patrick’s Day!)
- Caraway Irish soda bread muffins
- Paska, a traditional Slovak Easter bread
If you try this Dutch oven bread or any other recipe on the blog, please rate the recipe and leave a comment below. I love hearing from you, and other readers will benefit from your experience!
- One Year Ago: Rye Chip Chex Mix
- Two Years Ago: Chocolate-Dipped Almond Biscotti
No-Knead Four Seed Dutch Oven Bread
Ingredients
- 1 1/2 cups warm water - 95-110 degrees F
- 2 tablespoons honey
- 1 teaspoon salt
- 1 (5/16 ounces) packet rapid rise yeast - 2 and 1/4 teaspoons
- 3 cups bread flour - plus extra for dusting
- 2 tablespoons pumpkin seeds - plus extra for sprinkling
- 1 tablespoon sesame seeds - plus extra for sprinkling
- 1 tablespoon flax seeds - plus extra for sprinkling
- 1 tablespoon chia seeds - plus extra for sprinkling
- 1 tablespoon cornmeal - for dusting the parchment
Instructions
- In a large bowl, combine water, honey, and salt. Stir to dissolve the honey, then stir in yeast. Add 3 cups flour and all the seeds. Stir until the flour is well incorporated and a shaggy dough forms. Cover the bowl with a clean kitchen towel and let it rest at room temperature for about 2 hours, until at least doubled in volume.
- While dough is rising, cut a piece of parchment paper to about a 9” square. It should fit a medium-large Dutch oven. Sprinkle the parchment with cornmeal and set aside.
- Sprinkle the dough with additional flour, and use a wooden spoon or spatula to fold the dough in half, then in half again. Sprinkle again with flour, and, using well-floured hands, lift up the dough and pat it gently into a ball. Place it in the middle of your prepared parchment, with the dough’s seam side down. Scatter extra seeds on top, and let the dough rise uncovered at room temperature for 30-45 minutes.
- Soon after setting the dough for its second rise, place your empty Dutch oven and lid inside the oven and preheat to 450 degrees F.
- When bread has finished its second rise, carefully remove the Dutch oven and place on the stove. Lift the bread with its parchment paper and set it in the center of the hot Dutch oven. Cover with the lid, return to the oven, and bake for 30 minutes. Then, remove the lid and bake another 3-4 minutes, just until the top is golden brown.
- Using the parchment paper, carefully lift bread from the Dutch oven, and place on a wire rack to cool. Allow to cool completely, preferably one hour or more, before slicing.
Notes
- Preheat your oven pretty soon after you set the bread for its second rise - it can take awhile to get all the way up to 450!
- Be very careful while handling the Dutch oven, both before and after baking - it will be extremely hot!
- Slicing into bread before it’s completely cooled will cause it to release steam and become gummy! For best results, wait until it’s all the way at room temperature. I know it’s hard to do!
Nutrition Estimate


Excellent, my go to for guests & gifts! I can consume the entire round in one day.
Delicious! I made it first with roasted, salted pumpkin seeds, then with raw pumpkin seeds. Both excellent.
So happy to hear that you liked the bread! Thank you for leaving this helpful review!
Can I use 7 grain flour instead of bread flour?
I’m not experienced baking with 7 grain flour, but my understanding from a quick Google is that it typically does not have enough wheat content to serve as a 1-for-1 substitute in yeast breads such as this one. You should be able to use a whole wheat flour or experiment with substituting part of it, but I can’t recommend using all 7 grain.
On my 5th go around on this recipe, haven’t bought a loaf from the store in months!
How do you get the seeds to stick to the top of the loaf of bread? Especially when cutting it? I made this recipe and took it to work. Everyone loved it. Some even asked me to make bread for them. I could not get the seeds to stick to the top of the loaf though. Also, would it hurt anything to score the top of the bread? Thanks! I look forward to trying more bread recipies now, this recipie has showed me it’s not that scary to bake bread!!!
Can you substitute all purpose flour?
Yes!
This bread is incredibly delicious and so simple to make! What more could you want?? I will definitely be making this recipe again!
So happy to hear it’s a hit! Thank you for sharing this review, Sasha! 🙂
Fantastic recipe!!! I made it today, first time ever trying anything like this. It came out super soft & flavorful on the inside & great tasting harder exterior crust. Perfect for dipping into my cabbage soup today. Husband said it was baker quality bread. I added additional seeds I had in the pantry, otherwise, I tried to follow exactly, even messed up a couple of steps, but still came out great! Thank you for sharing! Going into keeper recipes.
This bread is tastier than dessert!!! So easy and so delicious. Made it today and tonight it will go with our lentil stew! Fantastic recipe. Except, knowing the yeast amount by measuring spoon is more helpful than 5/16th of a gram! (2 1/4 t.)
Hi Kathy, I’m so glad you liked the bread – we feel the same way! That’s a great point about the yeast measurement – I will update the recipe right now!
What would happen if I knead the dough to bring out those glutinous after the first rise?
Hi Jim, I doubt it would hurt anything if you knead the bread, though it’s really not necessary for this recipe. You would definitely want to use well-floured hands.
How many teaspoons of yest do I use? I know you mentioned the little packages but I have a large bag of instant yeast.
Thank you
You’ll want to use 2 and 1/4 teaspoons. Let me know how it turns out!
I made this bread yesterday and I can say it’s amazingly delicious and easy to prepare. Thank you so much for sharing!
My Dutch oven lives on my stove top too– it is just pretty to look at and reminds me that I could bake at any moment! What a great addition to use seeds here in this bread. The crust is gorgeous.
I love that dis requires no kneading! My family LOVEEEE bread so I’m going to give dis a try wif teh kids very soon.
This looks so delicious and sounds really easy! I love homemade bread and definitely will be giving this recipe a try!
I love bread so much I rather eat this than another dessert. I know I wouldnt be able to resist eating that whole round!
I love Dutch oven bread! Looks so delicious and crispy!
Oh I love that this requires no kneading! My family LOVEEEE bread so I’m going to give this a try with the kids very soon.
I’ve never made a no knead bread! I’m gonna have to try this!
I love homemade food and bread is something my daughter loves a lot. So this is going to be a big hit in my family. Lovely sharing Monica. 🙂