Dark Chocolate Cookies with Sea Salt
This post may contain affiliate links. Please read our disclosure policy.
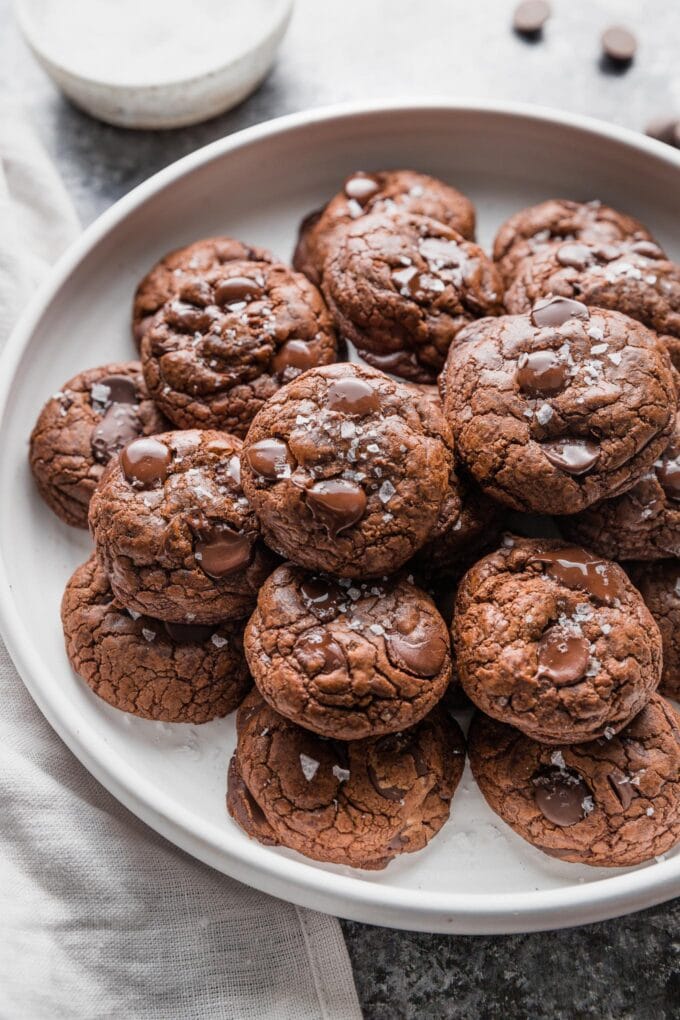
One bite and you’ll fall hard for these decadent dark chocolate cookies with sea salt. With real chocolate melted into the dough and an outrageous volume of dark chocolate chips, this is a treat worthy of any and every celebration!

Chewy Dark Chocolate Chip Cookies
If you know or are a dark chocolate lover, these are the ultimate cookies to make and to share. They’re made up of chocolate and more chocolate, with just a tiny bit of flour to stitch them together.
Sea salt — a pinch mixed into the batter plus a generous sprinkle over the just-baked cookies — adds just the right contrasting flavor to the rich chocolate, and makes the finished product feel slightly fancy.
You’ll also love that these cookies are quick and easy to prepare. You’ll need plenty of chocolate, but otherwise just simple baking pantry staples. And the dough requires just about a 10 minute rest on the counter. No need for a lengthy chill.
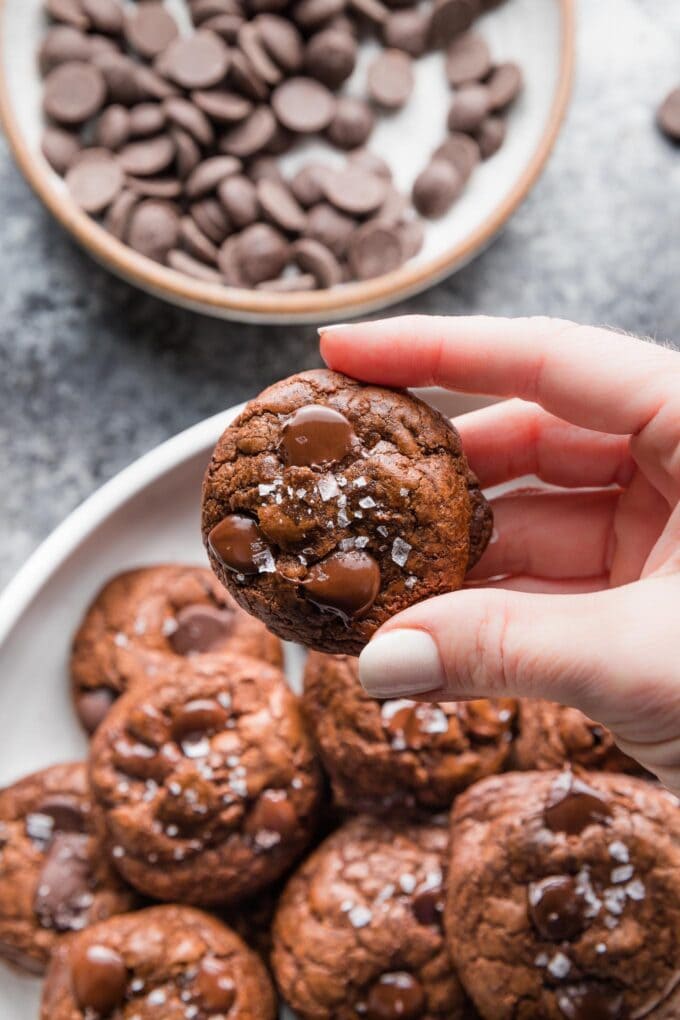
Just look at these thick, chewy delights! To try these dark chocolate cookies is to fall in love.
Ingredients & Common Substitutions
Here are a few notes and shopping tips about the ingredients you’ll need, as well as possible substitutions.
- Dark chocolate: 20 ounces total. This is the primary ingredient in these cookies, so now is the time to splurge on good quality stuff if you can. You’ll melt 8 ounces of it, and mix the rest into the dough as you would with normal chocolate chip cookies. You can buy the chocolate in any form: baking bars, chips, or chunks. It’s also fine to experiment with different levels of dark chocolate. The higher the percentage of cacao noted on the label, the less sweet and more intense the chocolate flavor will be.
- Butter: I use unsalted; if you use salted butter, cut the added sea salt by about half or to taste.
- Baking staples: All-purpose flour, baking powder, eggs, brown sugar (can use light or dark), and vanilla extract. You can substitute vanilla bean paste for the extract.
- Sea salt: A simple upgrade ingredient that is so worth keeping around! It adds flavor and texture and offsets the sometimes overwhelmingly sugary nature of sweets. A box of Maldon sea salt flakes will last a long time. Kosher salt is an OK substitute.
That’s it! There’s truly no need for cream, specialty cocoa powder, or anything else.
Are cookies OK without baking soda?
Some cookie recipes, such as this one, are intended to work perfectly without baking soda! They simply use baking powder as a leavener instead. The lifting power of baking powder is not quite as concentrated as soda, ounce per ounce, but it can yield a cookie with a more fine, light texture. You would not want to just omit baking soda from a recipe that calls for it, or you would end up with flat, unappealing cookies.
More mix-in ideas
Love loaded cookies? Add extra walnuts, macadamia nuts, white chocolate chips, or even dried cranberries or apricots.
How To Make Dark Chocolate Cookies
We love how easy these cookies are to whip up! Here are the basic steps:
- Melt together the butter and 8 ounces of the chocolate.
- Whisk the dry ingredients together.
- Blend eggs, brown sugar, and vanilla, then scrape in the melted chocolate, followed by the dry ingredients.
- Mix in the remaining chocolate by hand.
- Rest the dough for about 10 minutes on the counter. This is important because of the melted chocolate in the dough: a short resting period allows this chocolate to cool and hold its shape in the dough. When the dough scoops easily and holds the shape of a ball, it’s ready.
- Scoop and bake!
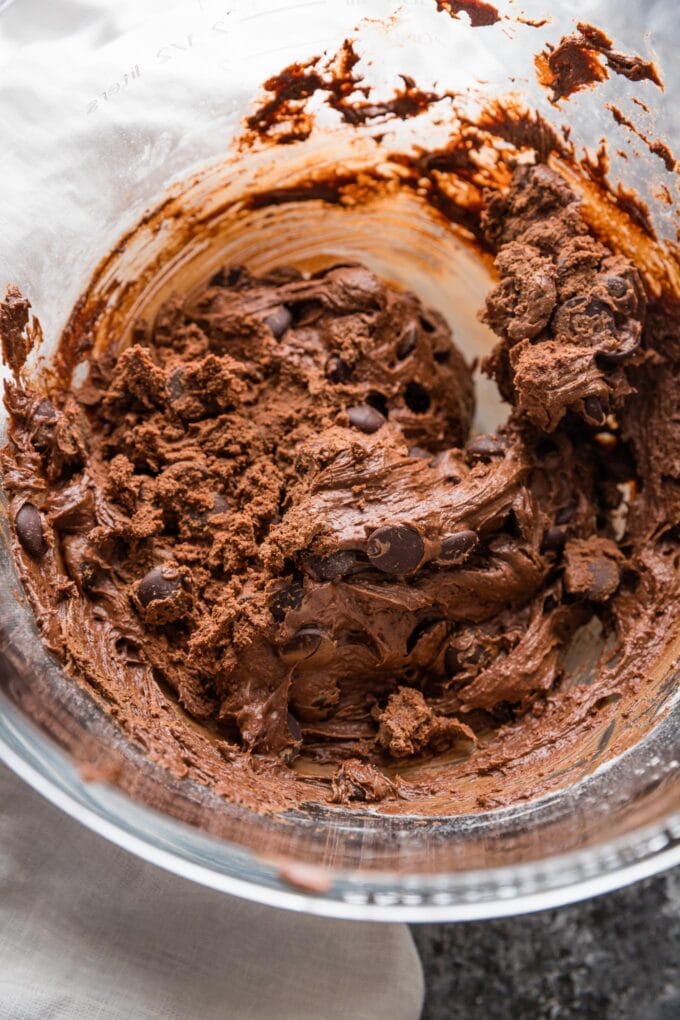
This recipe will yield 22-24 medium-size cookies. A cookie scoop saves tons of time and hassle when portioning them out.
Pro Tip: Check your oven temperature! These cookies bake perfectly for me over 11 minutes in a 350 degree oven, but my oven runs hot, so I have to set it to 325 to maintain the correct higher temperature! If your baked goods are often slightly off, a mis-calibrated oven could explain why. A very inexpensive oven thermometer will tell you for sure.
To roll or not to roll cookie dough
It’s completely personal preference whether you roll the scoops of this dark chocolate cookie dough into smooth balls or just bake with rough edges. I have showed one tray with both options here, before and after baking, so you can see the difference it makes.
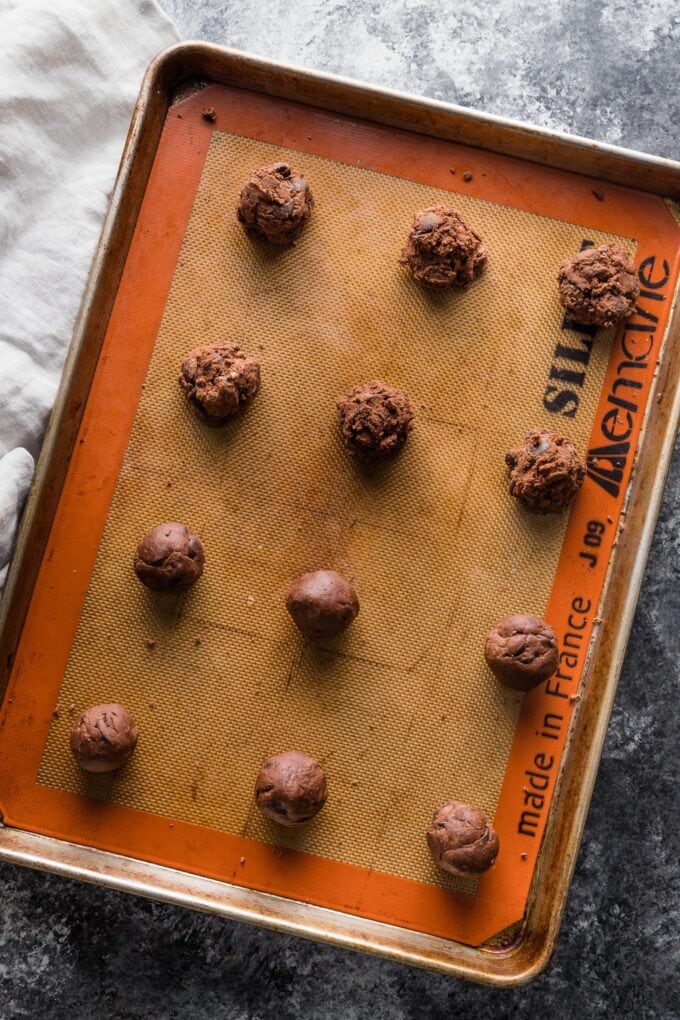
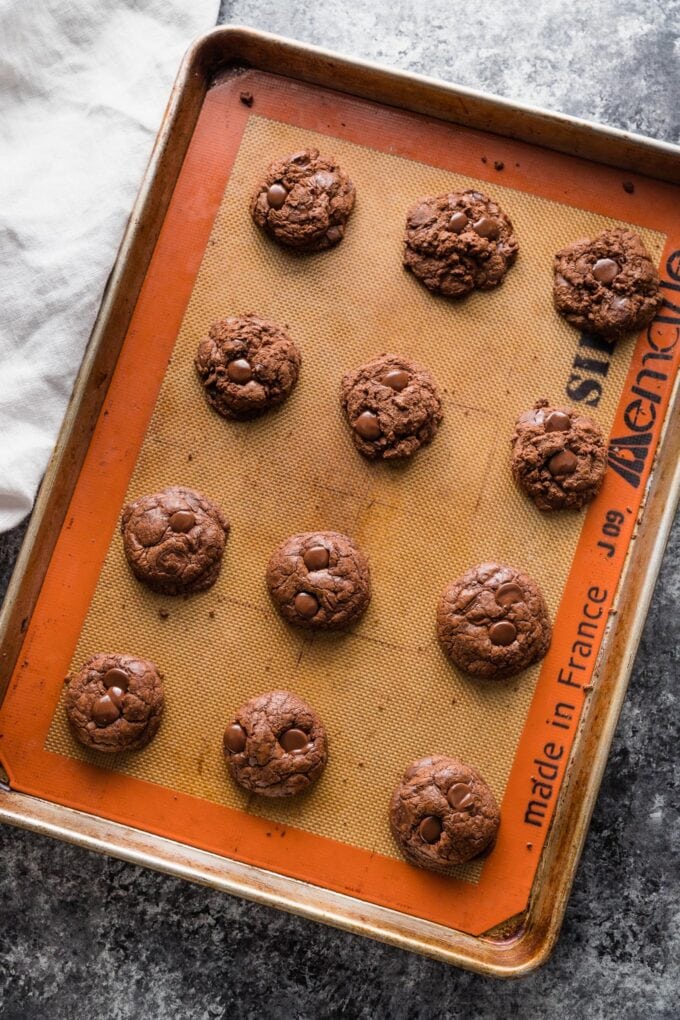
The taste is identical. Rolling the balls between the palms of your hands prior to baking simply makes rounder cookies and smoother tops. If you choose to roll, do so with slightly damp hands to minimize sticking. Works like a charm.
Don’t skip the sea salt sprinkle!
One thing not to skip is sprinkling the cookies with a little extra sea salt as soon as they come out of the oven. It’s the perfect finishing touch for flavor and looks!
I like to also reserve a few chocolate chips to press into the cookies right after they come out of the oven. This is purely for looks.
Storage and Make Ahead Tips
These are absolutely incredible warm from the oven, after just 5-10 minutes to cool on the baking sheet. The chocolate will be melty and irresistible.
- Store cookies at room temperature in an airtight container. They shouldn’t start to dry out before 2-3 days.
- To make the dough ahead of time, prepare through mixing in the chocolate chips, then store in the fridge for up to 24 hours. Allow to return mostly to room temperature before scooping and baking as directed.
- You can also scoop and store the cookie dough balls in either the refrigerator for 2-3 days, or freeze for up to 3 months, then bake as needed following the same procedures as outlined in my ultra soft chocolate chip cookies post. Cookies from the freezer are always a win!

More Easy Cookie Recipes
Cookie baking is downright therapeutic, and you can never have too many recipes from which to choose! Some of our favorites include rich bakery-style chocolate chip cookies, chocolate chip mini M&M cookies, Amish sugar cookies, chewy ginger molasses cookies, and these gorgeous soft frosted sugar cookies.
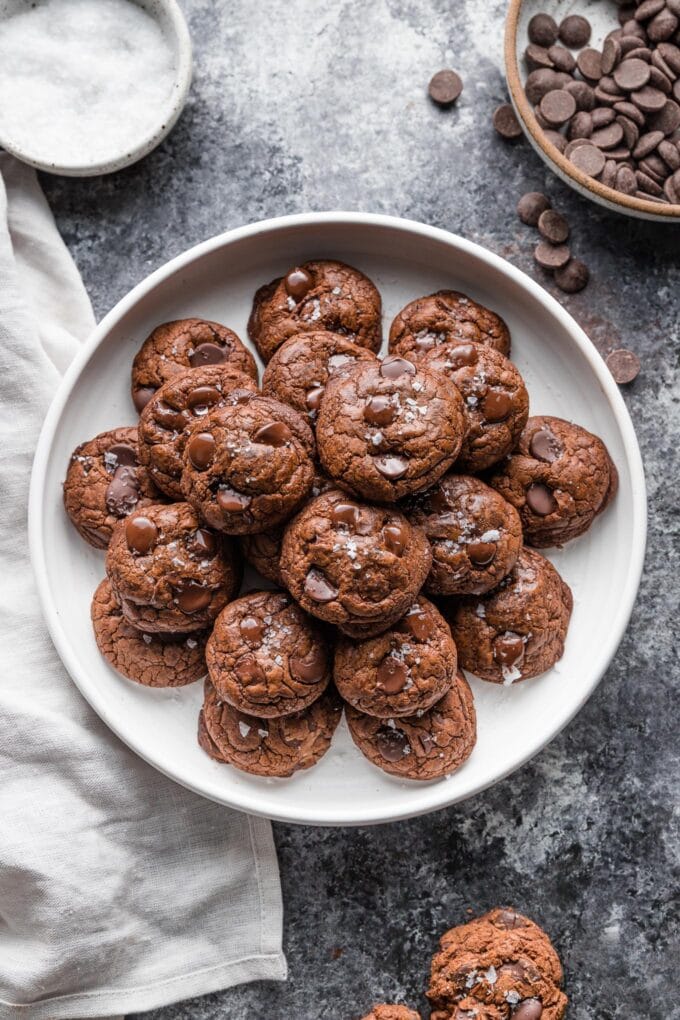
These are the perfect sweet treat for sharing. They have all the coziness of a cookie, but the rich chocolate plus sea salt combination makes them feel elevated and excited at the same time. I hope you love them as much as we do!
If you try this recipe for Dark Chocolate Cookies, don’t forget to rate it and leave a comment below. I love hearing how recipes turn out in your kitchen, and it helps other readers, too.
You can also FOLLOW me on PINTEREST, INSTAGRAM, and FACEBOOK for more great recipes and ideas!
Dark Chocolate Cookies with Sea Salt
Ingredients
- 8 ounces dark or bittersweet baking chocolate
- 4 Tablespoons unsalted butter
- 2/3 cup all-purpose flour
- 1/2 teaspoon baking powder
- 1/2 teaspoon sea salt plus extra for sprinkling
- 2 large eggs
- 3/4 cup brown sugar
- 1 teaspoon vanilla extract
- 12 ounces dark or bittersweet chocolate chips or chunks
Instructions
- Preheat oven to 350 degrees F. Line cookie sheets with parchment paper or silicone mats, and set aside.
- In a small bowl, combine 8 ounces chocolate with the butter. Using the microwave or a double boiler, melt them together until the mixture is smooth. (If using the microwave, do this at 50% power in 30 second intervals, stirring the mixture in between each burst of heat.) Set aside to cool slightly.
- In a separate medium bowl, whisk together the flour, baking powder, and 1/2 teaspoon sea salt.
- Using a stand or hand mixer, blend the eggs, brown sugar, and vanilla extract on medium-high speed for 3-4 minutes. Scrape in the melted chocolate and blend until the mixture is uniform. Add the flour mixture and blend again. Finally, stir in the chocolate chips, chunks, or pieces by hand.
- At this point, the dough will most likely be a bit thin. Allow it to sit for about 10 minutes on the counter or in the fridge, to allow the melted chocolate to cool further and give shape to the dough. When the dough is stiff enough to hold a rounded shape, it’s ready.
- Drop rounded tablespoons of dough onto the baking sheets, leaving 2-3 inches in between. Bake on a middle rack for 10-12 minutes, until the tops are shiny and crackly, but the cookies are still soft in the center. Remove from the oven.
- Press a few extra chocolate chips into the tops of the cookies (this is optional & just for looks) and sprinkle right away with additional sea salt. Let cookies cool on the baking sheets for about 10 minutes, then transfer to wire racks to cool completely. Enjoy!
Notes
- Chocolate really is the primary ingredient in these cookies, so if there’s a time to splurge on good quality stuff, this is it. You will melt 8 ounces of it, and mix the rest into the dough as chunks. You can buy it in any form you like; we most enjoy the results from melting 8 ounces of bars like this for the dough, and then using high-quality chocolate chunks such as this for the mix-in. You can also just use chocolate bars, and melt 8 ounces of it, then coarsely chop another 12 ounces or so into chunks.
- Cookies keep well tightly-covered at room temperature for 2-3 days.
- Recipe adapted from The Brewer & The Baker.
Nutrition Estimate
This post was originally published in March 2020 and has been updated with new photos and answers to frequently asked questions.









I made these cookies the other day while on maternity leave and cookie bombed our friends and loved ones with them to spread a little joy and sweetness amidst the COVID-19 quarantine. They are absolutely delicious and super easy to make (even with a three month old competing for my attention), and the ingredients are all easy to find, even with the limited supplies currently at the grocery store. They came out picture perfect with minimal effort. Thanks Monica!!
That is so wonderful to hear, Ruthie! So happy these cookies could help create some extra smiles! Thank you for leaving this great, helpful review!