Best Homemade Hamburger Buns (Mom’s Buns)
This post may contain affiliate links. Please read our disclosure policy.

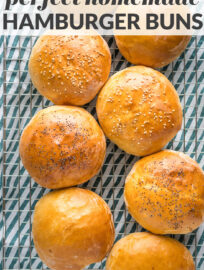
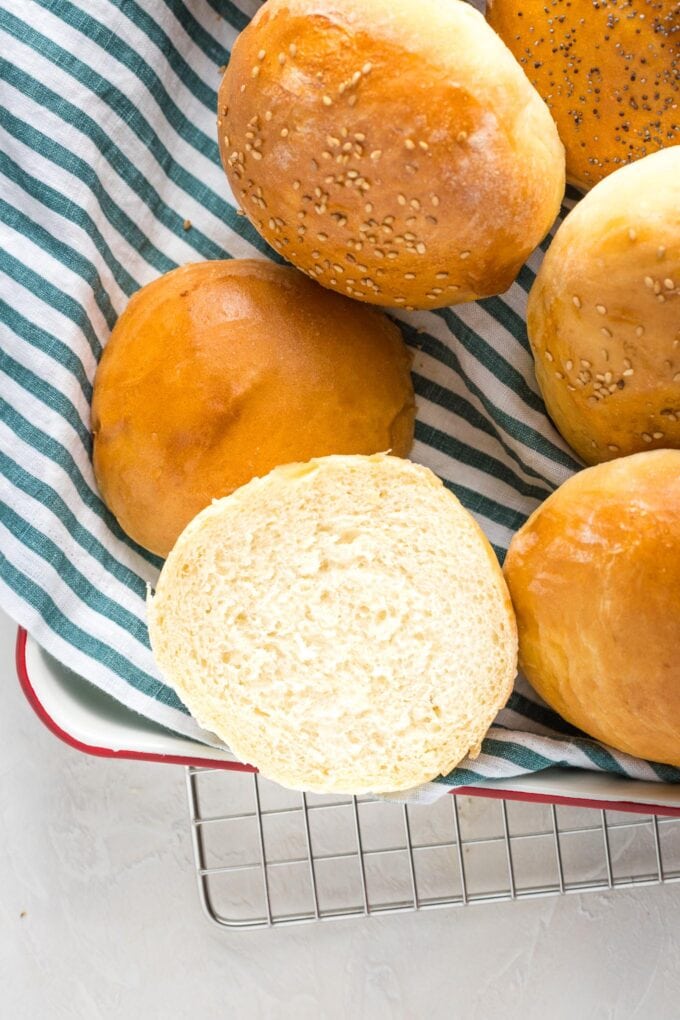
Learn to make homemade hamburger buns that are a million times better than anything store-bought. Buttery enriched buns are light and fluffy on the inside, but sturdy enough to hold your favorite burgers and all the toppings. This is a beloved family recipe; make them once and you’ll never look back!
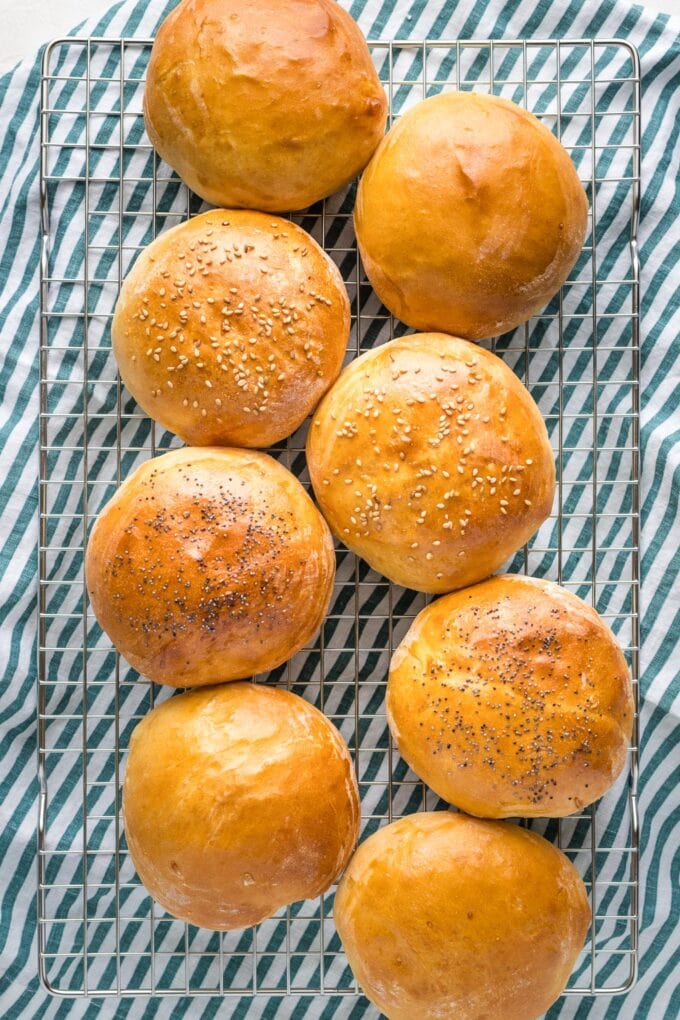
Get ready for oohs and aahs! These homemade hamburger buns will absolutely wow friends and family at your next BBQ. Nothing else so easily elevates ordinary burgers to a special event.
To be clear, I take no personal credit. This is a classic brioche-style roll passed down from an old family recipe.
My late mother-in-law was revered for many reasons, among them her cooking and baking, and we are so fortunate to have a copy of a spiral-bound family cookbook containing many of the classics on which my husband grew up.
Our copy of the book is tattered and worn, smudged with countless sauce splatters and butter streaks, but that never stops me from smiling as I pull it down from the shelf. And I reach for it often, most frequently to reference a recipe labeled “easy refrigerator rolls” or, more charmingly, “Mom’s buns.”
However, I’ve made a few annotations and adjustments for scale over time, so I thought it would be nice to have the clean recipe here. Plus, this way you can enjoy it, too. 🙂
Why you’ll love these buns
- All-natural — made from six simple ingredients.
- Easy to make — see instructions for using either an electric mixer or making the dough by hand below.
- Amazing flavor — thanks to an egg and touch of butter and sugar. Grandma wouldn’t do it any other way!
- Sturdy — strong enough to hold any burger without falling apart.
- Light and soft on the inside.
- Just plain fun — to make and to eat!
How long do these take?
Making homemade burger buns takes about three hours total, but the vast majority of that is inactive rising time, so all in all they’re surprisingly low-maintenance. If you plan to serve these with burgers for dinner, you can start making the dough around lunchtime or early in the afternoon, then just come back a couple of times to shape and pop the buns in the oven.
Make ahead tips
Interested in getting more of a head start? You’re in good company; this is how Grandma did it! In fact, my understanding is that she would make a double batch of this dough, keep in the fridge, and use as needed.
After making and kneading the dough, place it in a lightly greased bowl and transfer to the fridge overnight. It will rise slowly, so you can shape it into buns and bake at your leisure the next day or even two to three days later.
Allow at least one hour, preferably two, for the refrigerated dough to come to room temperature before shaping it into buns and proceeding with the second rise.
How to make hamburger buns, step by step
So, let’s go! If you’re nervous about baking with yeast, take a deep breath. I’m going to hold walk you through. You can do this!
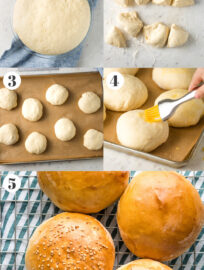
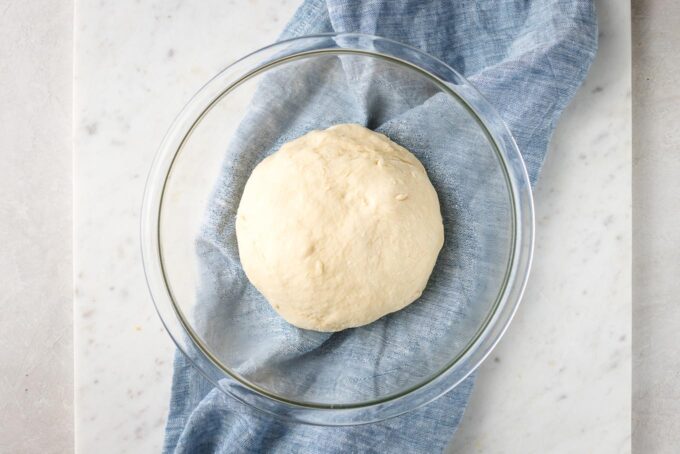
- Step 1: Make the dough and let it rise. You can use a stand mixer fitted with the dough hook or mix by hand. If doing it by hand, once the dough comes together you will need to scrape it out and knead it on the counter for a few minutes to get a smooth, even consistency, but it’s really not difficult.
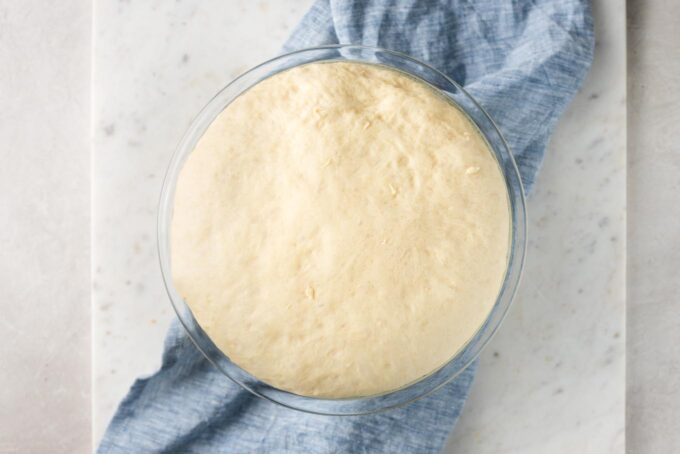
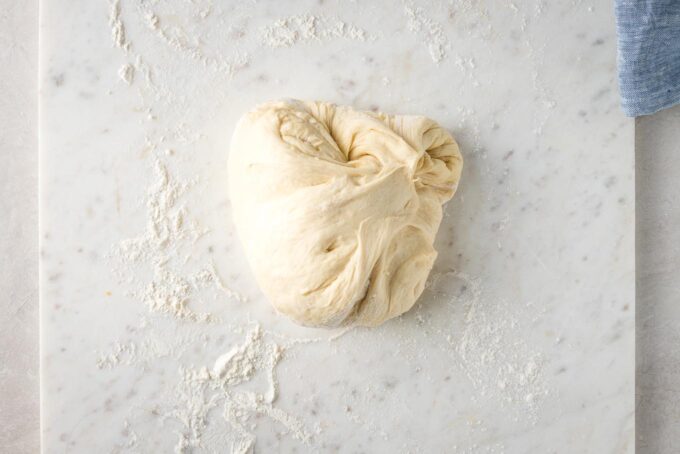
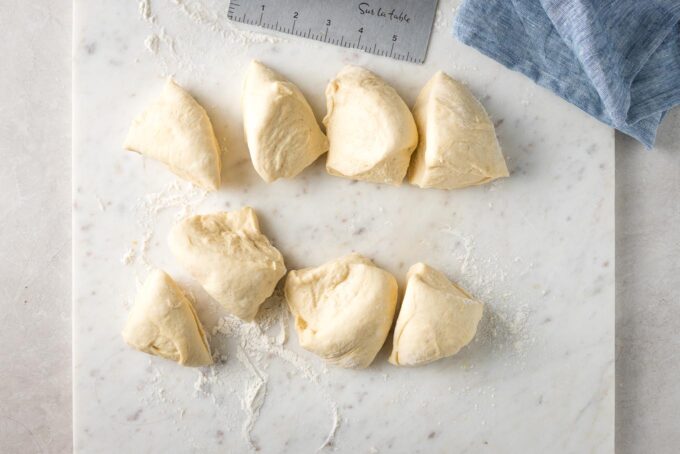
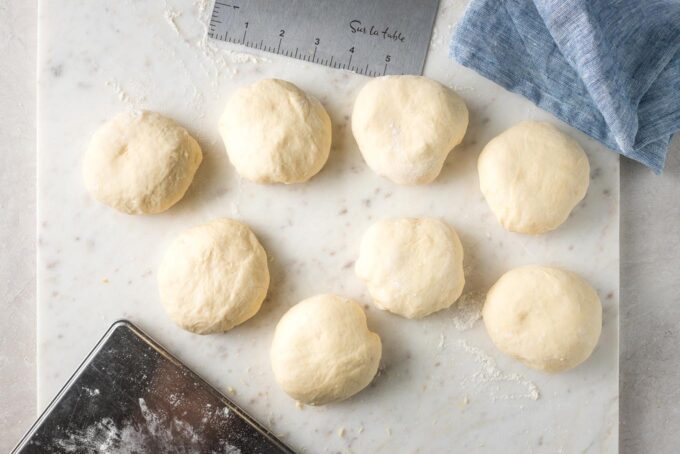
Allot as much as two hours for the dough to rise at this stage if possible. It may go more quickly, but you don’t want to rush or shortchange it, because if it doesn’t rise enough the finished buns will be less light and fluffy. You’ll know it’s risen enough when the dough is roughly doubled in size. - Step 2: Divide and shape the dough. Turn the risen dough out onto a lightly floured work surface, and use a sharp knife or a bench scraper to divvy it up into eight equal portions. Roll or tug each one into a smooth, round ball.
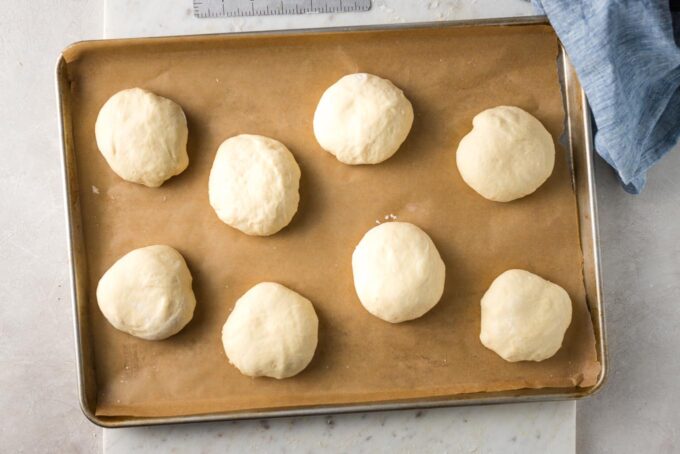
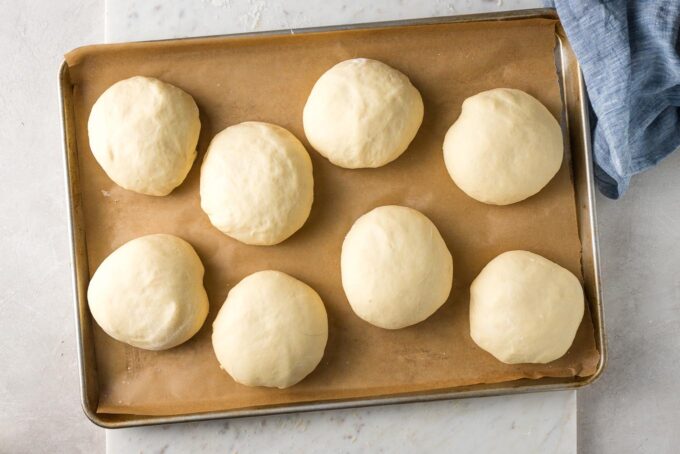
Pro Tip: For extra credit, use a digital kitchen scale to divide the portions more precisely. I never used to do this, and now that I’ve realized it only adds about one minute of work, I do it nearly every time. You can do this by simply eyeballing the portions at first, then weighing each ball and transferring a small pinch from the heaviest ones to the lightest. - Step 3: Give the buns a short second rise. These beauties are starting to look like hamburger buns! Set them on baking sheets lined with parchment or silicone liners, cover gently with a clean kitchen towel, and let them rise again for about 45 minutes. You can preheat the oven toward the end of this rising time.
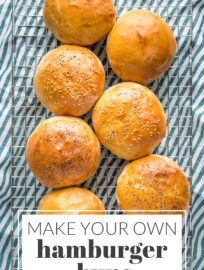
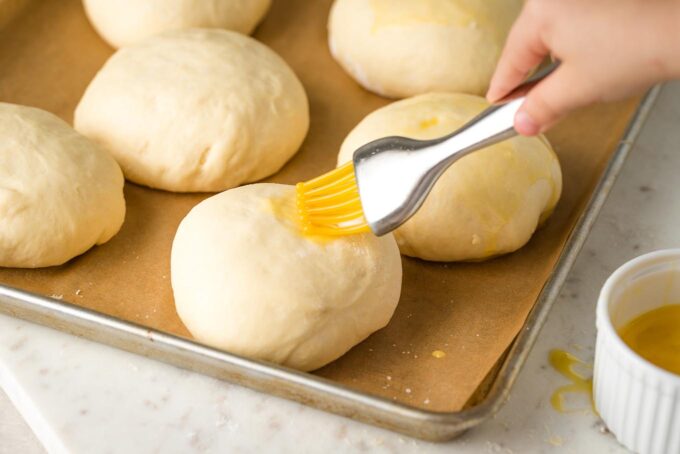
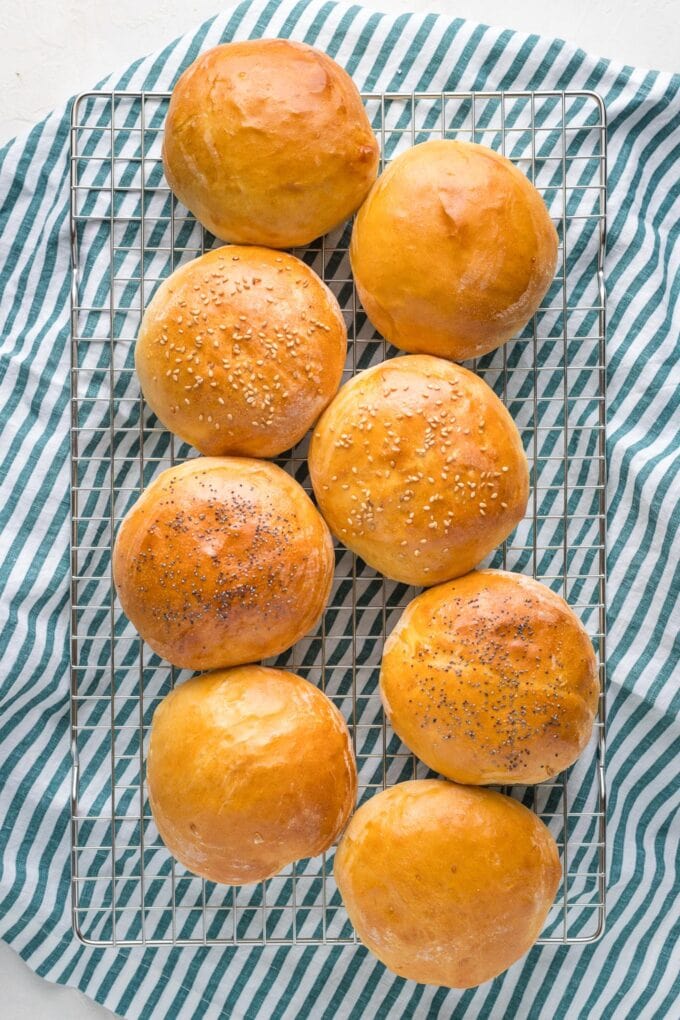
- Step 4: Bake! After about 45 minutes, or when the rolls are puffy, brush them with a light egg wash; this is what gives the tops a beautiful golden sheen after baking. This is also the time to sprinkle on any sesame or poppy seeds if you want to!
Pro Tip: For more extra credit, place a shallow metal baking pan on the lowest rack when preheat the oven. Just before baking the buns, add about 1/2 cup water to the pan. This creates steam in the oven and ensures the buns do not dry out at all.
Instant vs. active dry yeast
Uncertain about the kind of yeast you have? Good news! Instant and active dry yeast are completely interchangeable at a 1:1 ratio, so you can use either in the exact same quantity.
However, and this is important, active dry yeast should be “proofed,” AKA dissolved in warm water for a few minutes, as a first step. In contrast, instant yeast can be mixed straight into your dough. Breads made with active dry yeast may also take longer to rise.
Bread vs. all-purpose flour
If you have or can easily obtain bread flour, use it here!
Why? Bread flour‘s relatively high protein content speeds along the development of gluten in the dough — which is what gives these rolls the structure to hold your juicy burger! This is especially helpful when making brioche-style rolls like this recipe, because the added butter, egg, and sugar can actually inhibit the development of gluten.
All that said, I have also made these rolls at least a dozen times with plain old all-purpose flour, and they are still amazing! So do not skip the recipe if all-purpose is the mainstay of your pantry! Use what you’ve got; you won’t regret it.
More easy recipes for homemade bread
- Whole Wheat Pita Bread
- Miracle One-Hour Italian Breadsticks
- Four-Seed Dutch Oven Bread (our go-to with soup; no kneading required!)
- Perfect Flour Tortillas From Scratch (no yeast!)
Will you try making your own hamburger buns? Let me know, or post any questions, in the comments below!
You can also FOLLOW me on PINTEREST, INSTAGRAM, and FACEBOOK for more great recipes and ideas!
Homemade Hamburger Buns (AKA Mom’s Buns)
Ingredients
- 1 cup warm water between 100-110 degrees F
- 2 and 1/4 teaspoons (one packet) instant or active dry yeast see notes below
- 2 tablespoons granulated sugar
- 2 tablespoons unsalted butter very soft
- 1 large egg
- 1 teaspoon table salt
- 3 cups bread or all-purpose flour plus more for sprinkling, see notes below
- 1 egg yolk plus 1 tablespoon water or milk optional, for egg wash
- sesame or poppy seeds optional
Instructions
- If using active dry yeast, start by measuring warm water into a liquid measuring cup and sprinkling yeast on top. Set aside for 5-10 minutes. Meanwhile, measure and combine the sugar, butter, egg, and salt in a large mixing bowl or stand mixer. Add the yeast-water mixture, and stir briefly to mix.
- If using instant yeast, simply combine water, yeast, sugar, butter, egg, and salt in the large bowl and stir briefly to mix.
- Add 3 cups flour. Stir vigorously by hand, or knead with the stand mixer’s dough hook, until the flour is incorporated and the dough has an even texture and forms a smooth ball. If stirring by hand, you’ll probably need to turn the dough out onto a work surface once the flour is mostly incorporated but the dough is still a little lumpy. Knead it by hand for 1-2 minutes until it’s smooth and even. When finished, the dough should be feel tacky but barely stick to your fingers. If it’s too wet and sticky, add up to 1/4 cup of additional flour.
- Place dough in a lightly greased bowl. Set aside in a warm spot to rise until doubled in size, roughly 1-2 hours.
- After the dough has doubled, punch it down and turn it out onto a lightly floured work surface. Using a bench scraper or knife, divide the dough into 8 equal pieces. (Use a kitchen scale if you have one and want to be sure the pieces are very evenly-sized.) Stretch and shape each piece into a round ball, and space them a few inches apart on a baking sheet, lined with parchment or silicone mats if you have them.
- Loosely cover the baking sheets with a clean kitchen towel, and set aside once more to rise for about 45 minutes. Toward the end of the rising time, preheat the oven to 400 degrees F.
- Once the buns are puffy and the oven is preheated, combine the egg yolk and water or milk in a small bowl to make an egg wash. Lightly brush the egg wash over the top of each bun, and sprinkle with sesame or poppy seeds if desired.
- Bake buns for 12-14 minutes. If using more than one baking sheet, check halfway through the baking time and rotate the pans to ensure even browning. Remove buns and let cool on a wire rack until ready to use. Enjoy with your favorite burger or sandwich!
Notes
- Instant and active dry yeast are interchangeable, but active dry yeast needs to be proofed as a first step. Either works really well in this recipe as long as you take the extra step if needed.
- If you have bread flour on hand, use it here for the best result; it helps develop gluten in the dough, which leads to the best structure and sturdy buns. However, I’ve made these many, many times with all-purpose and been very satisfied, so don’t shy away from using it!
- If you want to make these partially ahead of time, make and knead the dough, then transfer it in the bowl to the fridge overnight. Allow 1-2 hours for the refrigerated dough to return to room temperature, then shape the buns and proceed with the second rise as directed.
- Extra buns keep well on the counter in a zip-top bag for 3-4 days. Check the bag periodically, and if condensation is building up on the inside, leave it open a crack to let some of the moisture out. Buns can also be frozen for 2-3 months; defrost on the counter overnight.
Excellent buns! Perfect for burgers! Any clue why my dough doesn’t double when using instant yeast after 2 hrs?
I’m glad you liked them! Instant yeast can be tricky- the most obvious thing that delays rising would be if it’s not warm enough in your kitchen, but it can also be helpful to activate the yeast, even though the instant kind “shouldn’t” require it. If you want to be extra sure it rises well, add it to warm water first just as you would “regular” active dry yeast, and for good measure, go ahead and mix the sugar in with that warm water and yeast as well.
These are absolutely the best! My family loves them. Have you ever used this recipe to make hot dog buns? Thanks for sharing
So glad you love them- that makes me so happy! I have always wanted to try that but haven’t gotten around to it yet- I think it would work perfectly just by shaping them lengthwise.
I have used this recipe for hamburger buns and they came out amazing!
Would the cook time be the same if I made them larger 4 or 6 sub rolls instead of 8?
I’m so happy you like them! Yes, the cook time will most be a bit longer – I haven’t tried to say for sure but I am guessing an extra 2-4 minutes per batch. Still looking for the light golden browning on top!
I love this recipe. Can I make slider buns with this recipe by just making them smaller?
Absolutely- what a terrific idea! Just watch closely as the bake time ought to be a bit less.
These are sooooo much better than store bought and very easy to make. My family enjoys them. Thank you for sharing.
These huns are so flavorful and delicious, but mine did come out with a slightly too tight crumb and they were a bit dense. Any tips on how to remedy that? 🙂
Hi Tina, I’m glad you enjoyed the flavor! It may be partly a matter of preference, because these aren’t super airy when I make them, either, but I do notice a difference when I give them ample time to rise vs. when I try to rush it along. (Which I definitely do from time to time just because, life.) I hope they were OK for you regardless and appreciate your time to leave this review and question!
This will be my go to recipe for sandwich buns for now. I am always looking for new recipes, but this one will be hard to beat.
This will be my go to recipe for sandwich buns. I have been looking for a bun that would not fall while holding it in my hand. Thank you.
The buns look amazing! No really, they look great! And I bet they are perfect for my next homemade vegetarian burger. I will give them a try soon.
Totally love these hamburger buns. I was so excited to bake them at home myself and I got it as expected. Thank you for sharing.