Spooky Chocolate Chip Cookies
This post may contain affiliate links. Please read our disclosure policy.
These Spooky Chocolate Chip Cookies are utterly fun and so easy to make, perfect for a festive treat that involves no fuss or special equipment. Press candy eyes and Halloween-themed sprinkles into your favorite cookie base — ours is included in the recipe here — and watch faces light up with smiles.

Cookies for the cute spooky crowd.
We’re big fans of what I call “cute spooky” when it comes to Halloween treats and decor. I personally pass on the faux gore and animatronic lawn decorations — probably because my preschooler actually finds them terrifying — but I’ll pick up a smiley little ghost, bat, or mummy any day.
If you feel the same way, or if you’re just looking for a really quick and easy festive treat, these cookies are here for you. Chewy, rich, chocolate chip cookies please any crowd. The studded extra spooky sprinkles and candy eyes make things fun. Press the eyes in immediately after taking cookies out of the oven so they stick well, otherwise you’ll have a lot of tiny candy orbs to sweep off the floor. (Ask me how I know.)
Ingredient Notes & Substitutions
All ingredients for these cookies are shown in the picture below; the bulleted list includes extra notes to help you shop and substitute well. Scroll to the printable recipe card at the bottom of this post for quantities and instructions.
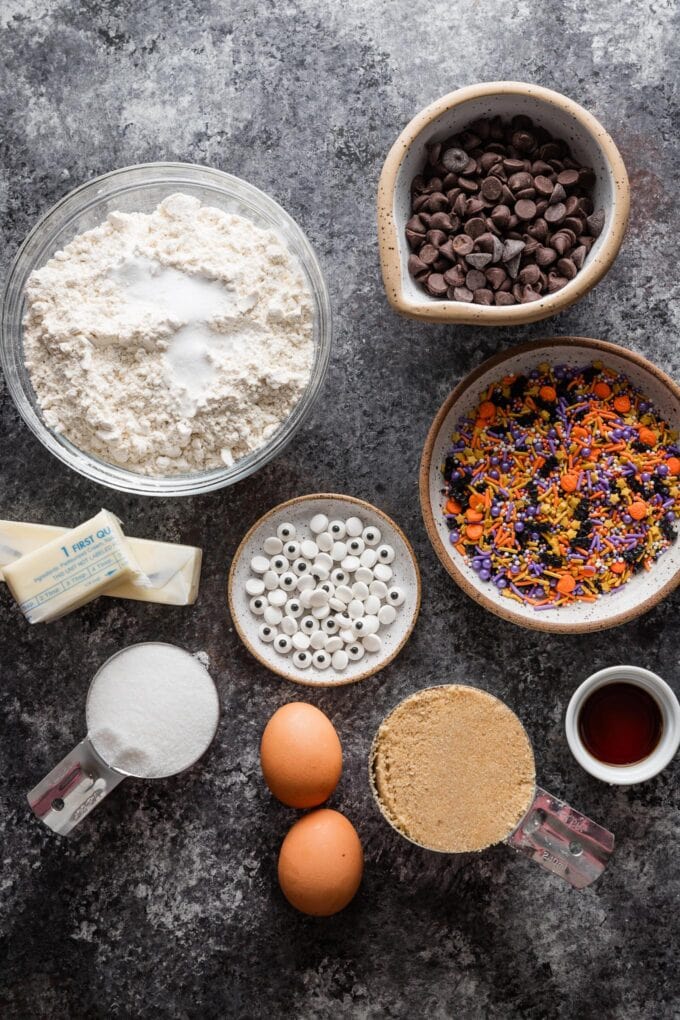
- Baking basics. You’ll need brown and white sugar, all-purpose flour, vanilla extract, one whole egg plus one extra yolk, baking soda, and salt.
- Butter. One and one half sticks, melted and left to cool slightly. I prefer unsalted but salted is absolutely fine to use, too.
- Dark or semi-sweet chocolate. Use chips, chunks, or a mix–anything you would ordinarily use in chocolate chip cookies.
- Halloween-themed sprinkles and candy eyes. The fun part! These are available on Amazon but also at Michael’s and other craft stores, or at Target or major grocery stores starting in mid-September.
This might be obvious, but you can make any chocolate chip cookie recipe you love “spooky” using just the eyes and sprinkles. The cookies in these photographs are my favorite bakery-style chocolate chippers; the ingredients and instructions for those are printed in the recipe card below.
My kids also adore these pudding chocolate chip cookies that are incredibly soft. Use your family favorite or try something new!

Tops Tips for Success
- Use a dough scoop. I cannot believe how many years I spent portioning cookie dough with two spoons! A set of dough scoops is affordable and makes this step so much faster and neater. Bonus: all your cookies are a uniform size with no extra effort.
- Be ready when the cookies come out of the oven! It is absolutely necessary to press the candy eyes into the cookies as soon as you pull them from the oven, otherwise they won’t stick. Be ready to go with the eyes and the remaining sprinkles in a small dish right next to the stove so you can get right to work. Try not to get distracted — I speak from experience here! 🙂
- Use a spoon to reshape the cookies if desired. If you work quickly, you can also use the inner rounded portion of a spoon to gently shape the cookies right after pressing in the eyes. When soft, the cookies are malleable and can be made more round — or, in this case, maybe you want to make them more monstrously shaped! Have fun!

Storage Tips
Storage: Baked cookies keep well tightly-sealed at room temperature for 2-3 days.
Freezing Dough Balls: After pulling apart, the balls of cookie dough can be flash frozen to bake later at your convenience. First lay them out on a parchment-lined baking sheet or plate, being sure they do not touch. Place in the freezer for 30-45 minutes. Once the dough balls are frozen solid, transfer them to a freezer bag or other storage container. (They can touch at this point.) When ready to bake, place frozen dough balls on lined cookie sheets and bake as directed, adding 2-3 minutes to the baking time.

Related Recipes
If you’re in the market for more Halloween-inspired recipes, try these next:
- Caramel Apple Cheesecake Dip
- Savory Sage Pumpkin Hummus
- Milano Mummies
- Blackout Chocolate Buttermilk Cake
- Halloween Cheeseboard
- Ghoulish Black Bean Dip
- Spooky Ghost Cupcakes
- Chewy Candy Bar Blondies
If you try these Spooky Chocolate Chip Cookies, don’t forget to rate the recipe and leave a comment below. I love hearing how recipes turn out in your kitchen, and it helps other readers, too.
You can also FOLLOW me on PINTEREST, INSTAGRAM, and FACEBOOK for more great recipes and ideas!
Spooky Chocolate Chip Cookies
Ingredients
- 2 cups plus 2 Tablespoons (10 5/8 oz.) all-purpose flour
- 1/2 teaspoon baking soda
- 1/2 teaspoon salt
- 12 Tablespoons (3/4 cup, 6 oz.) unsalted butter melted and cooled slightly
- 1 cup (7 oz.) packed brown sugar
- 1/2 cup (3 1/2 oz.) granulated sugar
- 1 large egg plus 1 egg yolk
- 2 teaspoons vanilla extract
- 1 cup dark or semi-sweet chocolate chips or chunks
- 1/2 cup Halloween-themed sprinkles
- candy eyes large, small, or a mix
Instructions
- Preheat oven to 325 degrees F. Line cookie sheets with silicone baking mats or parchment paper.
- In a medium bowl, whisk together flour, baking soda, and salt; set aside. With an electric mixer or by hand, beat the butter and sugars until well-combined. Beat in the egg, yolk, and vanilla extract.
- Add dry ingredients and mix at low speed just until dough is evenly combined. Gently stir in the chocolate chips and about half of the sprinkles.
- Portion out a large scoop of dough. (You can either use a large, 3 tablespoon dough scoop to make heaping mounds, or scantly fill a 1/4 cup measuring cup.) Roll into a ball. Hold the ball in the fingertips of both hands, and twist to pull it apart into two roughly equal halves. Place the halves onto the cookie sheet, jagged surface facing up, leaving about 2 inches between the cookies.
- Bake, rotating pans halfway through, for 12-14 minutes, just until the cookies are light golden brown with slightly hardened edges and soft, puffy centers. You want to remove them just before they look completely done, so the inside stays very tender.
- Immediately after removing cookies from the oven, press candy eyes into each one. You can give each cookie two eyes, some three, others one, etc. — get creative and have fun. Add the remaining sprinkles to the tops of the cookies, as well, pressing very gently if needed to adhere.
- Cool cookies on baking sheets for 10-15 minutes, then transfer to a wire rack. Enjoy!
Notes
- Important! It is absolutely necessary to press the candy eyes into the cookies as soon as they come out of the oven, otherwise they won’t stick. Be ready to go with the eyes and the remaining sprinkles in a small dish right next to the stove so you can get right to work (and don’t get distracted — speaking from experience here! 🙂
- Freezing Dough Balls: After pulling apart, the balls of cookie dough can be flash frozen to bake later at your convenience. First lay them out on a parchment-lined baking sheet or plate, being sure they do not touch, and place in the freezer for 30-45 minutes. Once the dough balls are frozen solid, transfer them to a freezer bag or other storage container (they can touch at this point). When ready to bake, place frozen dough balls on lined cookie sheets and bake as directed above, adding 2-3 minutes to the baking time.


My daughter and I made these cookies last weekend. We had such a fun time making them and they turned out so cute! They were also delicious! Seriously the best cookies I’ve ever made! No more store bought cookie dough! 🙂
On a personal side note, I’m so glad I stumbled upon your website! Our family recently moved to a small coastal town @ a year ago so we’ve had to step up our cooking at home game. All of the recipes I’ve made from your site are amazing! Not only are they delicious and easy to follow, I’ve learned so many cooking tips as a result of your ‘tips for success’, seasoning suggestions, substitutions, side dish offerings, etc. All of it is so helpful! Several of your recipes are now in our standing dinner rotation schedule!
Thank you for taking the time to share your talents and recipes! My family is so appreciative!
Laura- this means the absolute world to me. I, too, have stepped up my cooking after moves to different areas where I couldn’t get some of the ingredients or take-out options I was previously used to, and I completely understand. I just can’t tell you how much I appreciate knowing that these recipes and tips have enriched your life in this way. Thank you for sharing this, from the bottom of my heart.